The humble snipping tool might seem like a basic feature in Windows, but don’t let its simplicity fool you—it’s one of the most underrated tools for productivity. Whether you’re a student capturing lecture notes, a professional preparing a presentation, or just trying to save a meme, the Snipping Tool has your back.
But let’s be honest: if you’ve ever found yourself typing, “how do I use the Snipping Tool” or “why is my snipping tool not working,” you’re not alone. This guide will cover everything from using it like a screenshot ninja to troubleshooting every quirky issue that comes your way.
What Is the Snipping Tool and Why Is It Useful?
The Snipping Tool is a built-in Windows utility that allows users to take screenshots of their computer screen with ease. Whether you need to capture a specific window, a selected portion, or the entire screen, this tool has you covered. It’s a favorite among students, professionals, content creators, and even casual users who want to save or share something on their screen quickly.
But why is it so useful? For one, it eliminates the need for bulky third-party software. Everything you need is already on your device. Need to send your IT guy a screenshot of an error message? Want to grab an image from a website for a presentation? The Snipping Tool makes that super simple, and you don’t even have to paste the screenshot into Paint anymore.
Also, it gives you options. You’re not stuck with just one way to capture the screen. You can take snips in multiple shapes and edit or annotate them directly. It’s fast, reliable, and perfect for day-to-day use. And because it’s native to Windows, it integrates smoothly with your workflow—especially if you’re using Windows 10 or 11.
How to Open and Use the Snipping Tool on Windows 10 and 11
If you’re wondering “how do I use the Snipping Tool?”, you’re in the right place. Using it is easier than you might think.
Opening the Snipping Tool
On Windows 10:
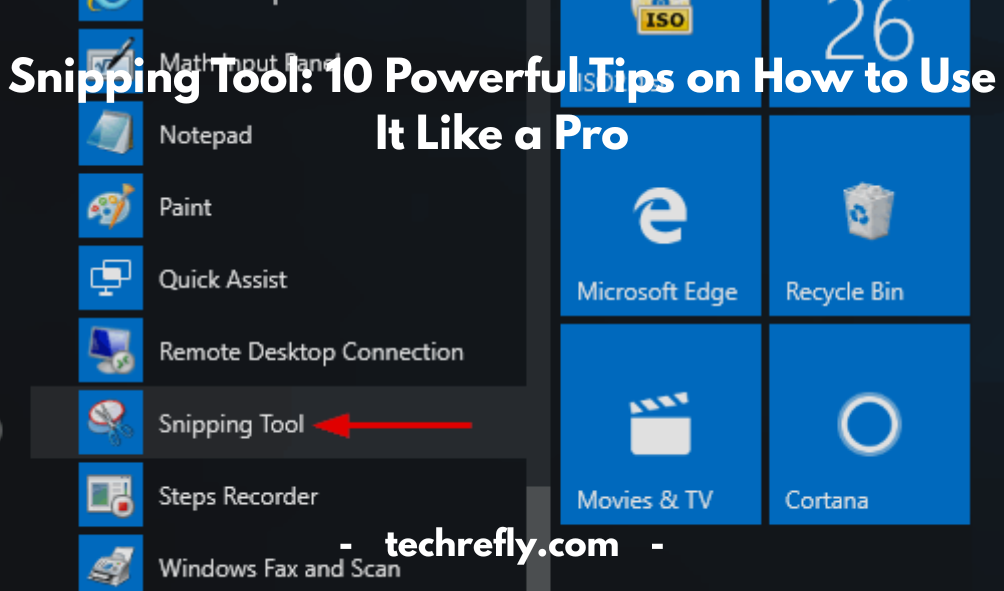
- Click on the Start menu and type “Snipping Tool” in the search bar.
- Click on the result and open the app.
On Windows 11:
- Microsoft combined the classic Snipping Tool with Snip & Sketch in this version.
- Press Windows + Shift + S to activate it directly or type “Snipping Tool” into the Start menu and launch it.
Using It
Once open:
- Click “New” to start a snip.
- Select the portion of the screen you want to capture.
- The image opens in a new window where you can annotate, highlight, or save it.
You can also choose a delay if you need to capture a menu that disappears quickly.
Different Snip Modes Explained: Freeform, Rectangular, Window, and Fullscreen
The Snipping Tool offers four primary snipping modes, and each serves a unique purpose:
1. Freeform Snip
Draw any shape around the area you want to capture. Great for capturing irregular elements like charts or hand-drawn notes.
2. Rectangular Snip
The most commonly used mode. Click and drag to create a rectangle over the area you want to snip. Ideal for screenshots of text, websites, or apps.
3. Window Snip
Want to capture just one open window, like your browser or a folder? This is your go-to. Just click the window you want, and bam—it’s captured perfectly.
4. Fullscreen Snip
As the name suggests, this captures your entire screen. It’s great when you need to show your full setup or everything that’s on display at once.
These options make the Snipping Tool incredibly flexible. You’re not locked into one format, which is why it’s often preferred over more basic screenshot tools.
Snipping Tool vs Snip & Sketch: Key Differences and Similarities
Many users get confused between Snipping Tool and Snip & Sketch, especially with recent Windows updates. Here’s the breakdown:
Similarities:
- Both allow users to take screenshots in different snip modes.
- They offer editing tools such as highlighting, cropping, and drawing.
- Both can be accessed through Windows + Shift + S on newer versions.
Differences:
- Snipping Tool is the original, simpler version. It’s straightforward and very lightweight.
- Snip & Sketch was introduced as a modern alternative with more editing features and touch support.
- Snip & Sketch allows you to open snips in a larger window and supports multiple snips at once.
- In Windows 11, Microsoft merged these two into one unified tool simply called the Snipping Tool, which brings the best of both worlds.
So, which should you use? If you’re on Windows 11, you’re likely already using the hybrid version. But if you’re still on Windows 10, try both and see which one fits your workflow better.
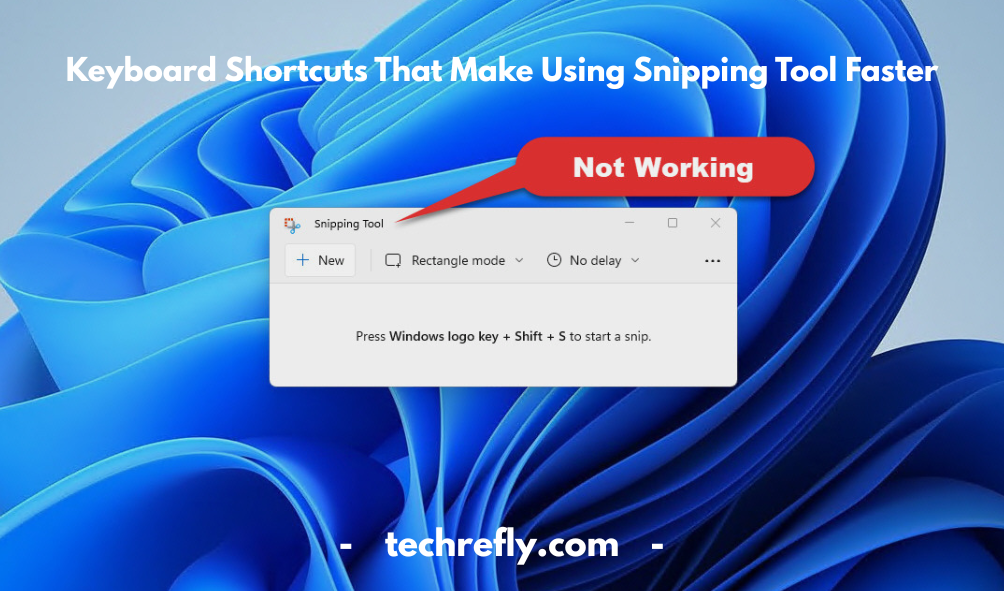
Keyboard Shortcuts That Make Using Snipping Tool Faster
If you’re all about speed and productivity, keyboard shortcuts are a game changer when it comes to using the Snipping Tool. Here are the most useful ones:
General Shortcuts:
- Windows + Shift + S: Instantly open the Snip & Sketch overlay.
- Alt + N: Start a new snip (only works inside the Snipping Tool app).
- Ctrl + S: Save your screenshot.
- Ctrl + C: Copy the snip to clipboard.
- Ctrl + P: Print the snip.
Snip Modes:
- After pressing Windows + Shift + S, your screen dims, and a toolbar appears at the top:
- First Icon (Rectangle): Rectangular snip
- Second Icon (Freeform): Freeform snip
- Third Icon (Window): Window snip
- Fourth Icon (Full Screen): Fullscreen snip
- First Icon (Rectangle): Rectangular snip
Knowing these can save you tons of time, especially if you’re frequently sharing or saving content. You won’t have to stop what you’re doing, reach for the mouse, and click through menus. Instead, it’s just click-clack-snatch, and you’re done.
How to Save, Edit, and Annotate Snips Easily
Once you’ve captured a screenshot using the Snipping Tool, knowing how to save, edit, and annotate your snips can seriously level up your productivity. Whether you’re creating content, giving feedback, or organizing notes, this part is key.
Saving Your Snips: After you snip something, a preview pops up. Here’s what to do next:
- Click the save icon (floppy disk symbol) or press Ctrl + S
- Choose your file name and format (PNG, JPG, GIF, or HTML)
- Pick a destination folder and hit Save
Pro tip: Set up a designated folder like “Screenshots” for all your captures so they’re easy to find.
Editing Snips: Snipping Tool comes with basic editing features:
- Crop the image to focus on key areas
- Use the pen or highlighter to mark important details
- Click the eraser to remove any doodles or marks
Annotating Snips: Annotations are super handy for collaboration. Here’s how to do it:
- Use the touch writing tool or stylus (if you’re on a touchscreen device)
- Change pen color or thickness to organize your notes visually
- Add a typed comment or overlay by copying the snip into apps like Paint, OneNote, or PowerPoint
Whether you’re giving feedback on a design, highlighting code, or sharing how-to steps, quick annotation is a game-changer.
Common Issues: Snipping Tool Not Working and How to Fix Them
Sometimes the Snipping Tool can be moody. If it’s not opening, freezing, or not saving your captures, here are some go-to fixes.
1. Snipping Tool Not Opening at All? Try this:
- Press Windows + R, type snippingtool, and hit Enter
- Or search for Snipping Tool in the Start Menu
- If that fails, restart your computer (yes, the classic fix often works)
2. The Tool Opens But Freezes or Doesn’t Capture: This could be a memory issue or a conflict with background processes.
- Press Ctrl + Shift + Esc to open Task Manager
- Find Snipping Tool under the Processes tab and click End Task
- Relaunch the tool and try again
3. Snipping Tool Not Working on Windows 11? It might be clashing with the newer Snip & Sketch app.
- Go to Settings > Apps > Installed Apps
- Find Snipping Tool, click Advanced Options
- Try Repair or Reset to restore functionality
4. Can’t Save Snips? Make sure you have the right permissions for your save location or try saving to a different folder (like Desktop).
Still stuck? Reinstalling or updating Windows can resolve compatibility issues.
How to Use Snipping Tool for Work, School, and Personal Tasks
The beauty of the Snipping Tool is its versatility. Let’s break down how you can use it in everyday life, education, and professional work.
For Work:
- Capture graphs, dashboards, or spreadsheets during meetings
- Annotate feedback on designs or reports
- Create internal documentation or quick walkthroughs
- Use screenshots to explain tech issues to IT support
For School:
- Snip lecture slides and add handwritten notes
- Highlight important parts of digital textbooks
- Save diagrams, formulas, or timelines for study
- Use snips in group projects to show your work visually
For Personal Tasks:
- Save recipes, plans, or ticket confirmations
- Capture part of a webpage or a funny meme
- Send annotated directions to friends and family
- Keep visual notes for home projects or DIY fixes
It’s basically your go-to digital notebook—just with screenshots!
Snipping Tool Tips for Windows 11 Users
Windows 11 brings a more polished and feature-rich version of the Snipping Tool. If you’re using it, here are tips to unlock its full power.
1. Use the Keyboard Shortcut Like a Pro: Hit Windows + Shift + S to trigger the snip menu instantly. It’ll dim your screen and give you four snip options: rectangular, freeform, window, and fullscreen.
2. Customize Your Experience: Go to Settings > Accessibility > Keyboard and turn on Use the Print Screen button to open screen snipping. That way, one key opens the tool.
3. Enable Auto-Copy to Clipboard: After snipping, your capture goes right to the clipboard—no saving required. Perfect for pasting directly into Teams, Word, or email.
4. Try the Delay Snip Feature: Want to capture a dropdown menu or tooltip? Click the three-dot menu > Delay, and set it to 3 or 10 seconds before it snaps the screen.
5. Use the Built-In Editor: You can:
- Crop
- Highlight
- Use a touch-friendly pen
- Adjust settings like light/dark mode for comfort
6. Keep It in the Taskbar: Right-click the app and choose Pin to taskbar so it’s always within reach.
Windows 11 really makes the Snipping Tool smoother, cleaner, and more intuitive.
Using Snipping Tool for Tutorials, Reports, and Presentations
Creating guides, reports, and visual presentations? The Snipping Tool is your silent partner in making them more professional and easy to follow.
For Tutorials:
- Capture step-by-step screen actions
- Add arrows and highlights to guide users
- Organize snips into a PowerPoint or PDF format
- Ideal for software guides, training manuals, or blog tutorials
For Reports:
- Snip charts, financials, or website analytics
- Highlight KPIs or notable trends with annotation tools
- Embed images directly into Word or Google Docs for a visual impact
For Presentations:
- Use visuals instead of bulky text
- Insert annotated snips into slides to keep audiences engaged
- Mark up product mockups or designs for discussion points
Best Alternatives to the Snipping Tool in 2025
While the Snipping Tool is a versatile tool for basic screenshots, there are several alternatives available that offer more advanced features. As technology continues to evolve, the need for more professional and powerful screenshot tools has increased. Here are some of the best alternatives in 2025:
- Greenshot
Greenshot is an open-source screenshot tool that is packed with features, including the ability to capture scrolling windows, edit screenshots, and even upload them directly to cloud storage services like Dropbox. It’s ideal for users who need more control over their screen captures. - Lightshot
Lightshot is another great alternative that lets you take screenshots quickly and easily. With a minimalist design, it offers instant editing and sharing features. You can even search for similar images using its integrated online search tool. - SnagIt
SnagIt is a premium screenshot tool that allows for highly customizable screen captures. It comes with advanced features like video capture, panoramic scrolling screenshots, and the ability to create GIFs. Its robust editing suite makes it ideal for professionals and content creators. - PicPick
PicPick offers a wide range of editing options after capturing a screenshot, including annotations, cropping, and effects. It also supports capturing scrolling windows and offers a built-in color picker and protractor. - ShareX
ShareX is a powerful open-source tool that allows for not only screenshots but also screen recording. It supports GIF creation, custom hotkeys, and more. ShareX is perfect for users who want more advanced features without a cost. - FastStone Capture
FastStone Capture is another excellent alternative for Windows users. It supports screen recording and offers features like image editing, cropping, and text annotation. Its compact interface makes it user-friendly, and it’s perfect for quick captures.
Each of these tools offers unique features that can enhance your screenshot experience. Whether you’re looking for something free or a tool with advanced editing and sharing capabilities, you’ll find a suitable alternative to the Snipping Tool in 2025.
How to Record Screenshots Like a Pro Using the Snipping Tool
The Snipping Tool is great for still images, but did you know it’s also possible to record screen captures with it? While Snipping Tool doesn’t natively support video recordings, there are ways to capture both static screenshots and videos with professional-level quality using a combination of tools. Here’s how to do it:
- Use Windows 10/11’s Screen Recorder Feature (Xbox Game Bar)
While the Snipping Tool handles still images, the Xbox Game Bar allows you to record your screen while you perform actions. To use it:
- Press Win + G to open the Xbox Game Bar.
- Click the “Capture” widget.
- Press the red record button to start recording.
- Press the stop button when finished, and the video will be saved automatically to your system.
- Press Win + G to open the Xbox Game Bar.
- Use Third-Party Tools Like SnagIt or ShareX
For professional-quality recordings, using tools like SnagIt or ShareX is a great option. SnagIt lets you capture both still images and high-quality videos of your screen. Similarly, ShareX allows you to record the entire screen or specific regions, and then you can edit and annotate the recording directly in the tool. - Recording in Presentation Mode
When you’re recording a tutorial or a presentation, make sure to set your screen to “Presentation Mode.” This removes pop-ups and notifications that may interfere with the flow of your screen recording. You can then use the Game Bar or SnagIt for smooth recordings. - Use Hotkeys for Efficient Recording
For smooth, uninterrupted recordings, use hotkeys. Set them up in the third-party tools for easy and fast access to start and stop recordings without needing to navigate through menus.
By combining these techniques with a tool like Snipping Tool, you can take professional screenshots and record high-quality videos with ease.
Privacy and Security Concerns When Using Screenshot Tools
While screenshot tools like the Snipping Tool offer great convenience, they come with potential privacy and security concerns. Here’s what you need to consider when using them:
- Captured Content Could Be Sensitive
One of the biggest risks when using screenshot tools is that sensitive data may be unintentionally captured. If you’re working with personal or financial information, ensure that you’re only capturing what’s necessary. Be mindful of any pop-up notifications, password prompts, or confidential emails that might be visible on the screen during your screenshot. - Malicious Software Can Exploit Screenshot Tools
Some screenshot tools, especially those downloaded from unverified sources, could potentially carry malware or spyware. These malicious programs can access and capture your screenshots, which could then be sent to hackers. It’s important to only download software from trusted sources and keep your operating system and security software up to date. - Screenshots Can Be Stored Without Your Knowledge
Certain screenshot tools may store captured images in cloud storage or local files, sometimes without explicitly asking for permission. Be cautious about where your screenshots are saved, especially if they contain private or confidential information. Make sure the tool you use offers options to securely save and delete your images. - Risks of Sharing Screenshots Online
If you’re sharing screenshots on social media, email, or cloud platforms, ensure they don’t reveal sensitive personal information. It’s easy to forget that a screenshot could contain confidential data like email addresses, passwords, or account numbers. Blur or redact sensitive information before sharing. - End-to-End Encryption for Cloud Services
If you use cloud storage to save your screenshots, look for services that offer end-to-end encryption. This ensures that only you can access the captured content, preventing unauthorized access.
In summary, while screenshot tools can enhance productivity, it’s essential to stay vigilant about the security of the content you capture. Take proactive steps to protect your privacy and ensure that sensitive information is not compromised.
Customizing Snipping Tool Settings for Efficiency
The Snipping Tool comes with various settings that can be customized to improve your workflow and make screenshotting more efficient. Here are a few ways to make it work better for you:
- Set Default Snip Type
By default, the Snipping Tool allows you to choose between Freeform, Rectangular, Window, and Fullscreen snips. Customize your snipping tool to open in your preferred snip type every time you launch it. This eliminates the need to choose each time you want to take a screenshot. - Keyboard Shortcuts for Faster Snipping
Using keyboard shortcuts is one of the best ways to streamline your screenshot process. Here’s how:
- Press Windows Key + Shift + S to immediately start a screen snip.
- This shortcut will bring up the Snip & Sketch tool, and you can choose to capture any portion of the screen instantly.
- Press Windows Key + Shift + S to immediately start a screen snip.
- Set Snipping Tool to Auto-Save Snips
By default, Snipping Tool requires you to manually save each screenshot. However, you can use third-party tools like SnagIt or ShareX, which can automatically save your snips to a predefined folder. This will help maintain better organization and ensure you never lose an important screenshot. - Pin Snipping Tool to Taskbar for Quick Access
Instead of searching for the Snipping Tool every time you need it, simply pin it to your taskbar. Right-click on the Snipping Tool icon in the Start menu and choose “Pin to Taskbar” for quicker access at any time. - Use Delay for Timed Snips
If you need to capture a drop-down menu or any animation that appears after a delay, use the “Delay” option in the Snipping Tool. This allows you to set a delay of up to 5 seconds, giving you time to prepare the screen before the screenshot is taken.
By customizing these settings, you’ll save time and ensure that your screenshot tasks are more efficient.
Troubleshooting: Snipping Tool Stops Working Randomly
At times, the Snipping Tool may stop functioning correctly, which can be frustrating, especially when you need it for quick screenshots. Here’s how to troubleshoot and fix common issues:
- Restart the Snipping Tool
The first step when the Snipping Tool stops working is to close the application and reopen it. This may help fix any temporary glitches causing it to malfunction. Sometimes, simply restarting your computer can also solve the issue. - Check for Updates
Ensure that both your operating system and the Snipping Tool are up to date. Check Windows Update and make sure there are no pending updates that could be causing compatibility issues. An outdated version of the tool may have bugs that can cause it to crash. - Run the Windows Troubleshooter
If the Snipping Tool continues to malfunction, try running the Windows troubleshooter:
- Go to Settings > Update & Security > Troubleshoot.
- Select “Additional troubleshooters” and click on “Windows Store Apps.”
- This tool can automatically detect and fix common problems with apps, including the Snipping Tool.
- Go to Settings > Update & Security > Troubleshoot.
- Clear Cache and Temporary Files
Clearing the cache and temporary files can often resolve glitches in Windows apps. Use the Disk Cleanup utility to remove unnecessary files that could be interfering with the Snipping Tool’s performance. - Check for Conflicting Software
If the Snipping Tool continues to stop working, check if there’s any third-party software conflicting with it. Disable any antivirus programs or screen recording apps temporarily to see if they’re causing the issue. - Reinstall Snipping Tool
If all else fails, reinstalling the Snipping Tool could be the solution. You can uninstall it from Settings > Apps and then reinstall it from the Microsoft Store.
How to Automatically Save Snips to a Specific Folder
Automatically saving snips to a specific folder can streamline your workflow and reduce the hassle of manually organizing your screenshots. While the Snipping Tool itself doesn’t offer an in-built option to specify a save location, you can achieve this through a few tricks.
One way is to use the Snip & Sketch app, the updated version of the Snipping Tool on Windows 10 and 11. Here’s how you can configure it for automatic saving:
- Use the Snip & Sketch Settings:
- Open Snip & Sketch by pressing Windows + Shift + S or searching for it in the Start menu.
- After you take a snip, click on the Notification popup, and it will open in Snip & Sketch.
- Unfortunately, Snip & Sketch doesn’t support directly setting a save folder, but after the snip is made, you can manually save it to any folder you prefer by clicking the Save As option.
- Open Snip & Sketch by pressing Windows + Shift + S or searching for it in the Start menu.
- Using Third-Party Software: If you want full automation, third-party applications like Greenshot or ShareX can allow you to configure a default folder for all screenshots. These tools provide extended functionality, like customizable hotkeys and automatic file naming.
By using these steps or third-party tools, you can efficiently streamline your workflow and ensure all your snips are stored in a specific folder.
Creative Ways to Use Snipping Tool in Design Projects
The Snipping Tool can be a versatile asset in design projects, especially for tasks involving visual planning, brainstorming, or feedback collection. Here are a few creative ways to use the Snipping Tool in design projects:
- Mockup Capture: Snipping Tool is perfect for quickly capturing design elements, wireframes, or prototypes on your screen. Whether you’re working with UI/UX mockups or website designs, snip key areas of your work and share them with teammates.
- Idea Boards: Designers often gather inspiration from various sources, and Snipping Tool is great for collecting visual ideas. You can use it to snip parts of websites, photos, illustrations, or even Pinterest pins. Save these snips into a project-specific folder for future reference.
- Feedback Collection: When collaborating with clients or team members, Snipping Tool allows you to quickly capture their feedback by taking a snapshot of the screen, highlighting the areas of focus, and sending it back to them for review.
- Visual Instructions: For tutorial content or detailed design guides, Snipping Tool is an excellent way to create clear, visual step-by-step instructions. These can be annotated with text or drawn upon to highlight certain areas of interest in the design.
- Color Palette Capture: If you’re working on digital art or web design, Snipping Tool can be used to capture color palettes directly from a website or app. This saves you time compared to manually picking out colors or copying hex codes.
The Evolution of the Snipping Tool Over the Years
The Snipping Tool has come a long way since its introduction in Windows Vista in 2002. Initially, it was a basic tool that allowed users to capture freeform, rectangular, window-based, and full-screen screenshots. However, as Windows evolved, so did this tool:
- Windows Vista Era: The first version of the Snipping Tool was pretty simple, offering only the basic screenshot capture options. It lacked many advanced features but laid the groundwork for future versions.
- Windows 7 and 8: With Windows 7, the Snipping Tool received a few upgrades like the ability to delay a snip for a few seconds. This made it easier to capture contextual menus or mouseover actions. In Windows 8, the Snipping Tool was integrated into the Windows Store, making it more accessible.
- Windows 10 and Snip & Sketch: With Windows 10, the Snip & Sketch tool was introduced, evolving beyond the Snipping Tool. The Snip & Sketch app included features such as easy annotations, screenshots of scrolling windows, and quick sharing options. Windows 10 made it easier to capture snips via keyboard shortcuts, and it improved the delay feature significantly.
- Windows 11: Windows 11 continues the evolution, enhancing Snip & Sketch with more flexible features, especially for users who need to take multiple types of screenshots quickly. Snipping Tool in Windows 11 merges both Snip & Sketch and the traditional Snipping Tool, offering a more unified interface and smoother user experience.
The Snipping Tool has certainly evolved from a simple program to an essential screenshot tool with increased functionality, integrations, and user-friendly features.
Integrating Snipping Tool with Microsoft Office and OneNote
Integrating the Snipping Tool with applications like Microsoft Office and OneNote offers many practical advantages, especially for users who regularly create documents, presentations, or notes. Here’s how you can integrate the tool into these Microsoft products:
- Microsoft Word: Snipping Tool makes it easier to include screenshots within your Word documents. Once you’ve captured an image, you can easily paste it into your document (using Ctrl + V or right-clicking and selecting Paste). This is particularly useful for creating step-by-step guides or tutorials with visual references.
- Microsoft PowerPoint: Taking quick screenshots using Snipping Tool and embedding them into PowerPoint presentations is a breeze. This can help highlight key elements of your presentation visually, making it more engaging for the audience.
- Microsoft OneNote: Snipping Tool and OneNote work hand-in-hand for note-taking and organizing information. You can snip images, portions of text, or even screenshots from web pages and send them directly to your OneNote notebook. OneNote even allows you to draw or annotate your snips to emphasize specific points or add notes.
- Microsoft Excel: If you’re working with data in Excel and want to highlight certain information, Snipping Tool is perfect. You can capture the chart, table, or data range and insert it into your Excel sheet as an image, which helps visualize your data and makes it easier to present.
By integrating Snipping Tool with these Microsoft Office applications, you’ll enhance your productivity and make your documents, presentations, and notes more visually appealing.
What’s Next for the Snipping Tool: Features on the Horizon
The Snipping Tool has evolved significantly over the years, but what does the future hold for this indispensable tool? Here are some potential features that could be added:
- Cloud Sync: Imagine being able to save your snips directly to OneDrive or another cloud service. Cloud syncing would allow you to access your screenshots across multiple devices, whether you’re on your phone, laptop, or desktop.
- AI-Powered Features: Future versions of Snipping Tool could integrate artificial intelligence for smarter annotation and editing options. For example, AI could automatically suggest tags or provide context-based annotations.
- Advanced Editing Tools: While Snipping Tool already allows for basic annotations, future updates could include more advanced image editing options, such as cropping, filters, or text recognition (OCR). These would allow users to edit their snips more professionally.
- Expanded Sharing Options: Snipping Tool might soon allow you to directly share snips to social media platforms, messaging apps, or emails without the need to manually save and upload files.
- Improved Screenshot Delay: Users could expect more flexible delay features, such as adjustable time frames for capturing snips. This would make it easier to capture dropdown menus, tooltips, or mouse-hover elements in real time.
Why Screenshots Matter More Than Ever
Visual Communication Is King
We live in a visual world—screenshots cut through the noise and get straight to the point.
Snipping Saves Time
Skip the thousand-word explanation—show instead of tell.
What’s Coming Next for the Snipping Tool?
AI-Powered Features on the Horizon
Speculation suggests future versions could automatically detect objects or text in screenshots for better annotations.
Integration with Microsoft 365
We might see better syncing with OneNote, Teams, and Outlook soon.
Conclusion
Whether you’re capturing bugs for tech support, creating educational content, or just saving funny internet moments, the Snipping Tool is a versatile weapon in your digital arsenal. Once you get familiar with its features—and know how to fix common hiccups—you’ll wonder how you ever got by without it.
FAQs
1. Is the Snipping Tool still available in Windows 11?
Yes! It’s been redesigned and includes features from Snip & Sketch for a better experience.
2. What shortcut opens the Snipping Tool?
Use Windows + Shift + S to bring up the screenshot overlay instantly.
3. Why isn’t my Snipping Tool working?
This could be due to outdated drivers or software bugs. Restart your PC or check for system updates.
4. Can I record videos with the Snipping Tool?
Not currently. For screen recording, consider using Xbox Game Bar or third-party tools like OBS Studio.
5. Where are snips saved?
By default, they are not saved unless you manually click “Save.” You can choose your preferred folder when saving.